
Last updated on September 6th, 2021 at 05:25 am
Introduction
Instead of coping with preset game and server options in an existing server, you can make and run your own Minecraft server, and enjoy a great level of customization as well as full control over your server.
Linode allows you to to receive a $100 60-day credit after you create an account. This means that you can run a Minecraft server in the cloud for free for 2 months. Follow the link below to receive a $100 60-day credit.
Follow the link below to receive a $100 60-day credit.
Step 1. Choose a cloud service provider
I am going to use Linode as my cloud service provider. I really like their services and use it as my website hosting provider. Moreover, Linode allows you to create a Minecraft server with just a few mouse clicks, which makes it a great choice for that purpose.
Step 2. Create a new virual server
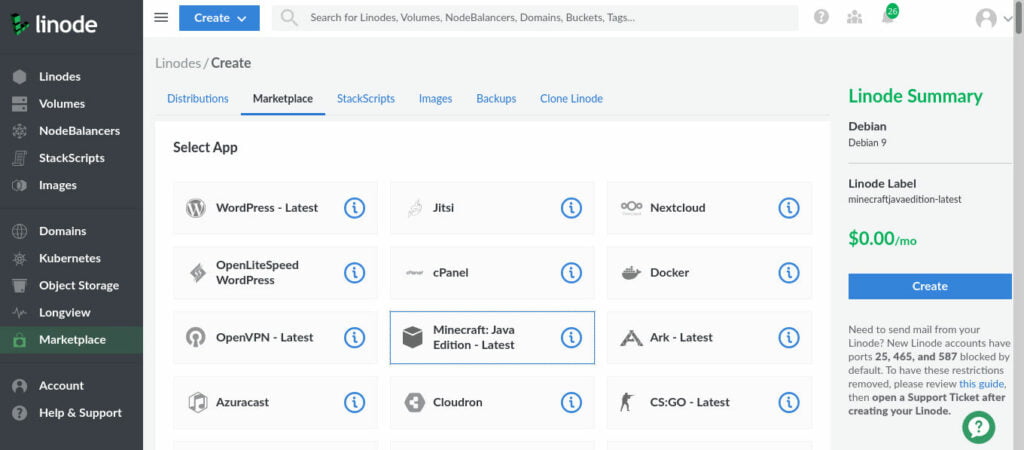
Firstly, log in to Linode and go to Marketplace. Then select Minecraft: Java Edition – Latest app.
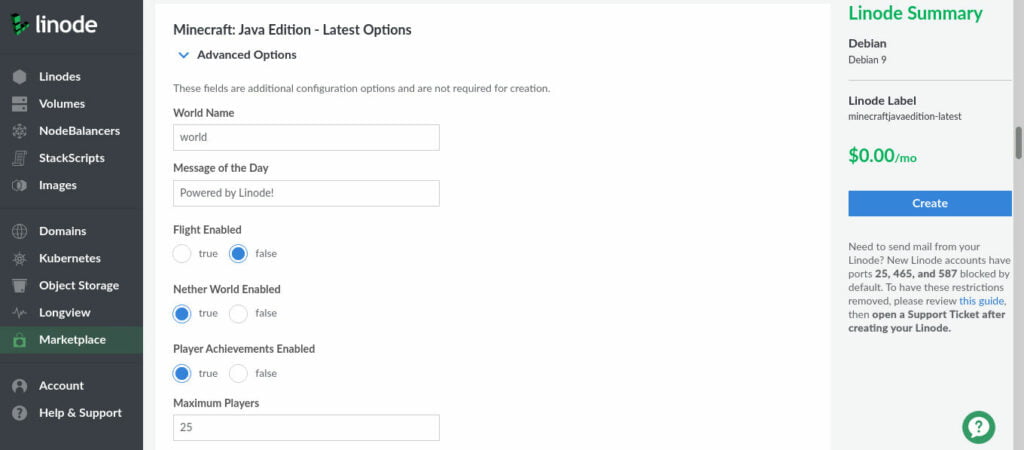
Next, scroll down and choose the Minecraft server options that suit you best. Refer to the table below if you don’t know what they mean.
Advanced Options Description
| World name | This is a server name that is displayed in the lobby |
| Message of the Day | A message that you can see below the server name |
| Flight Enabled | Enables in-game flight |
| Nether World Enabled | Allows to access The Nether in the game |
| Player Achievements Enabled | Enables in-game achievements. Achievements are connected to the user account and not to the server. |
| Maximum Players | Sets up the maximum number of players. |
| Player Idle Timeout Limit | Specifies the number of minutes a player can be idle before being kicked out of the server |
| Difficulty Level | Sets the difficulty level for the game: peaceful easy normal hard |
| Hardcore Mode Enabled | If you set it to true, then Difficulty level will always be hard and players who die will become spectators |
| PvP Enabled | Enables PvP on the server. true – players can kill other players false – players can’t kill other players Indirect damage sources will still deal damage to other players, regardless of the setting. |
| Force Game Mode Enabled | If you set it to true, then the players will always join in the default game mode. Otherwise the players will join in the game mode they left in. |
| World Type | Sets the world type: default – Standard world with valleys, water, hills, etc. flat – This world doesn’t have any features, such as hills, water, and valleys. legacy |
| World Seed | This option sets a seed that the new world will be generated from. Leave it blank for a random seed. |
| Spawn Animals Enabled | If you set it to true, the animals will spawn normally, otherwise they will vanish immediately. |
| Spawn Monsters Enabled | If set to true, the monsters will appear at night and in the dark. Otherwise there will be no monsters. |
| Spawn NPCs Enabled | Villagers will spawn if you set it to true. |
| Game Mode | Allows to you specify the game mode: survival creative adventure spectator |
| Structure Generation Enabled | Structures will generate in new chunks if you set it to true. |
| Maximum Build Height | Sets the maximum height for building. |
| Maximum World Size | Sets the maximum world size. |
| View Distance | Determines the amount of world data that the server sends to the client. 10 is a good choice, while lower numbers are better for a slow network. |
| Command Block Enabled | Enables command block |
| Querying Enabled | Enables GameSpy4 protocol. |
| Enable RCON | Enables remote console protocol. |
| RCON Password | Sets a password for remote console protocol. |
| RCON Port | Sets the port number for RCON. |
| Maximum Tick Time | Sets the maximum time in milliseconds that 1 tick can take before the server watchdog stops the server. |
| Network Compression Threshold | Compresses the packets that are equal to or more than the size in bytes that you set. Don’t set this number too low, or the packets will become larger in size after compression. Set to -1 to turn it off. |
| Op-permission Level | Sets the default permission level for operators. |
| Port Number | Sets the port number for the server. |
| Snooper Enabled | If you set if to true, it will allow the server to send snoop data to http://snoop.minecraft.net |
| Use Native Transport Enabled | If you set it to true, it will enable linux packet sending/receiving optimization. |
Step 3. Select VM region and size
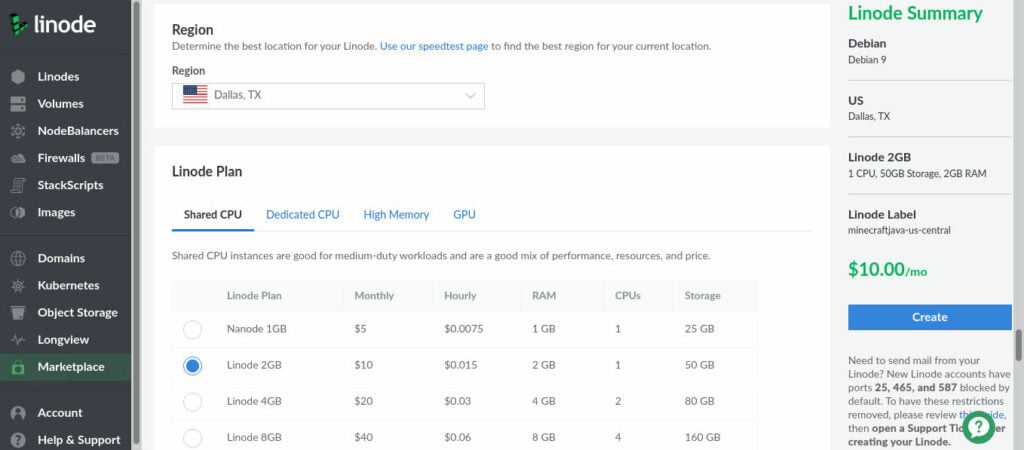
Selecting a region close to you will reduce your network lag and might slightly improve performance if your connection is slow. Gamepedia recommends you to have at least 1 GB of free RAM for the server, which means that a VM with 2 GB of RAM is usually a good choice.
Step 4. Set root password and add SSH keys
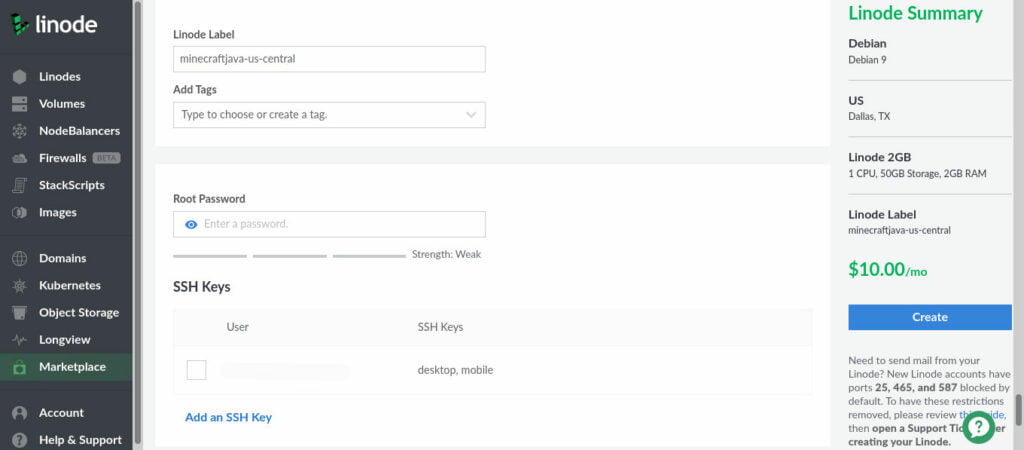
Select a label for your VM, set a root password and add SSH keys. You can skip adding keys and do it later, but I recommend you to do it, both for security purposes and as a backup login option in case you forget your root password. Don’t forget to disable password login, if you add SSH keys.
That’s it. Press Create and enjoy your new Minecraft server.