
Last updated on August 26th, 2021 at 04:55 pm
Introduction
Making a Rust server is a relatively simple and straightforward process. One-click apps with an already preinstalled server make it possible to deploy a server in less than 3 minutes.
In this tutorial I am going to show you how to do it.
Let’s go.
Step 1. Choose a cloud service provider
There are many gaming cloud service providers, some offering nothing more than a VM with a server image preinstalled, charging 3, 4 or sometimes 5 times more than, for example, Amazon AWS.
I am going to choose Linode as my cloud service provider. It provides everything you need when you deploy a Rust server starting from just $10 per month. And if you use their server for less than 1 month, you will pay just $.015 per hour for a 2GB RAM configuration.
Step 2. Select one-click app to deploy
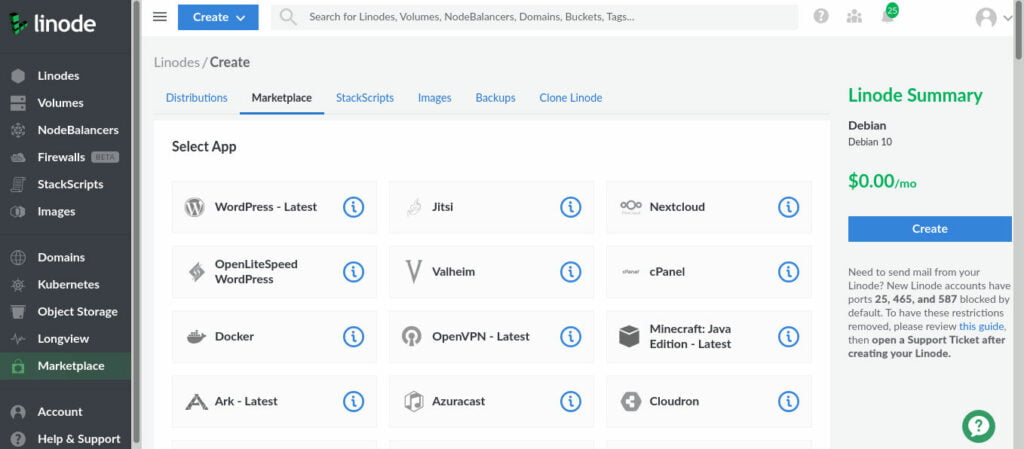
First, create an account with Linode if you don’t have one, and go to the Marketplace tab.
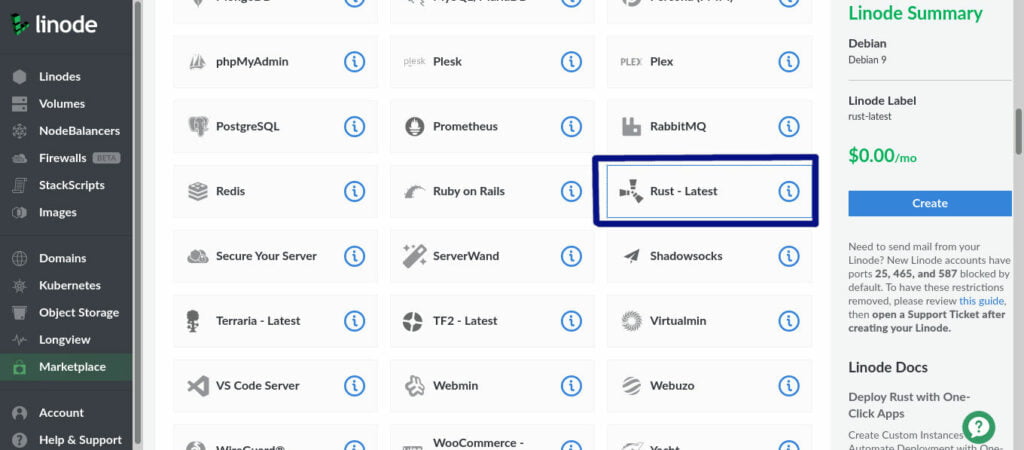
Then scroll down and choose the Rust – Latest app.
Step 3. Set up options for your server
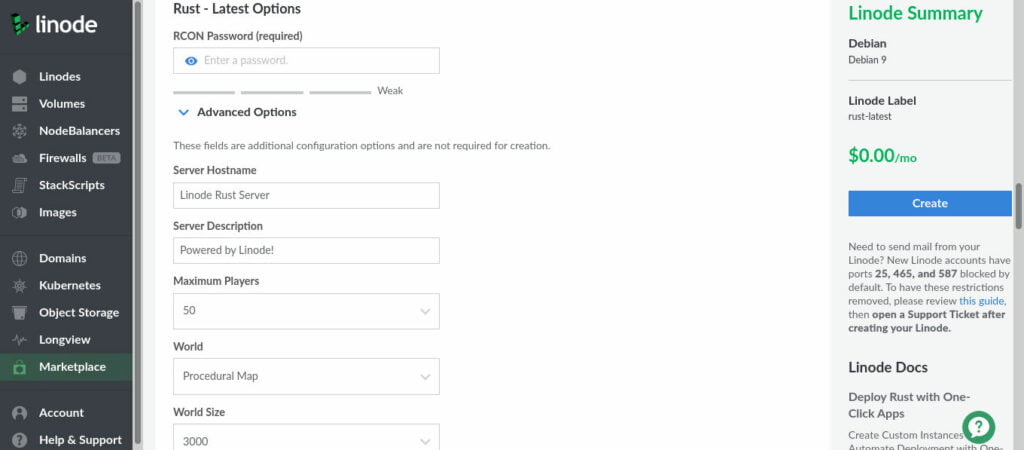
After that, all you need to do is choose the server options that suit you best. You can refer to the table below if you don’t know what they mean.
Rust Server Advanced Options
| RCON Password (required) | The password that you will use to connect to the server |
| Server Hostname | The name of your server that others can see |
| Server Description | The message that you can usually see in the lobby below the server name |
| Maximum Players | The maximum number of players that can play on the server at the same time |
| World | The type of map that the server creates: Procedural Map – a map generated from the seed Barren – the map has a barren landscape with only trees and rocks. Good for improving performance and PvP. HapisIsland – a premade map with a fixed landscape SavasIsland_koth – is also a premade map. |
| World Size | The size of the map that the server creates |
| Seed | The seed determines the layout of the map. You can put some random number here, reuse previous seeds (and get the same map layout), or choose a seed from the map gallery |
| Global Chat Enabled | Global chat is when there is only one chat on the server and all players can see its messages. |
| PvE Enabled | If you set it to true, then you won’t be able to harm other players. Set it to false to enable PvP. |
Step 4. Select your server configuration
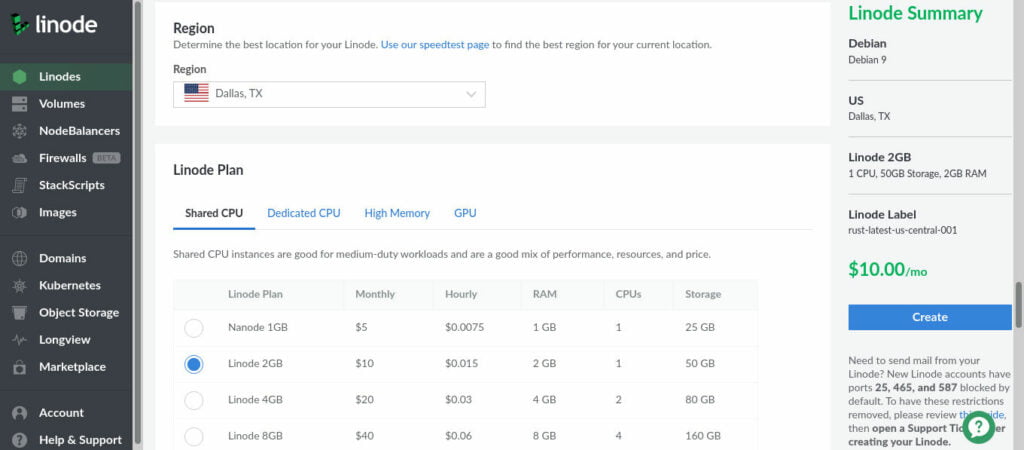
The minimum requirement for a 25-slot server is 4GB of RAM, but if you have a small map and a small number of players, you can experiment: pick a 2GB RAM server and add a 1GB swap file. It will save you money and you can upgrade anytime without recreating the server.
While I don’t recommend a 2GB RAM configuration, I’ve made an experiment and run a 2GB RAM server for 20 minutes. You can take a look at the performance results here.
Step 5. Connect to your server
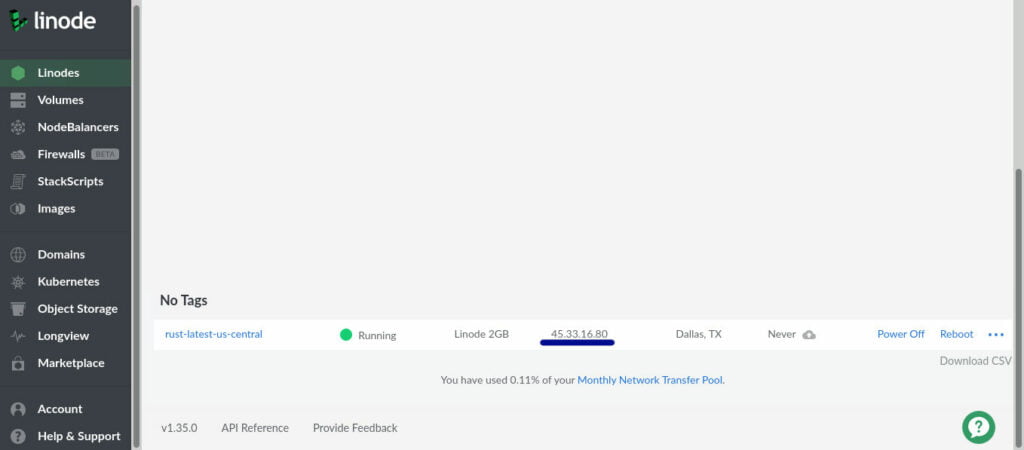
The only thing left to do is to connect to your server. Go to the Linodes tab and check the IP address that your server uses. Then launch the game and connect to the server using this IP address.
Enjoy the game!